Learn to solder comic

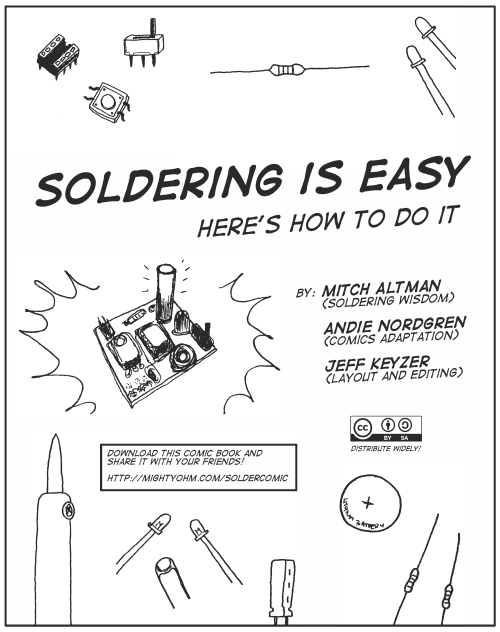
Hacker and inventor Mitch Altman, Andie Nordgren and Jeff Keyzer teamed up to make the “Soldering is Easy. Here’s how to do it” comic book.

Altman often travels the globe, to introduce people to soldering, and of course, linked to that, soldering is also an introduction to the innards of technology.

This pdf has been published under an open Creative commons license. A book – physical world – will follow. I’ll try to follow up how they will deal with licensing there.

In any case – another sweet reference for beginners. For sure it will be part of the Ellentriek library!

Via BoingBoing.


DIY Day is looking for participants!

DIY Day is looking for participants!

WHAT?
A day of creation and entertainment with DIY workshops, art expo, concerts,
jam sessions, street animation, circus, gardening, interactive
installations, markets and much more for all ages!

There will be multiple islands, each about a specific theme. At "The Lab" we
will be working & exhibiting work involving electronics, eg workshops about
making your own speaker out of scrap, the link between electronics &
vegetables, bicycle alternator sound, electromotor fun, circuitbending, a
contactmic sculptures, ... and some noize with Nohmad sound!

WHO?
A group of friends with different backgrounds getting together with a mutual
interest and organizing a day for everybody!

WHEN?
10 September 2011 - 13h till 21h
Afterparties start at 21h

The workshops at the lab will be from 14h00 till 18h00

WHERE?
Brussels Centre:
Marché des cochons / Varkensmarkt & MicroMarché
Metro Sint Catherine / Sint Katelijne

WANT TO HELP?
Anybody who shares our interests, or has others to share with us, and can
help during DIY DAY is more than welcome!!
We are still looking for people interested in giving a helping hand at the
lab, helping participants with their projects, present your own project
(maybe even do a demo or small workshop), hang around, have fun!

If you would like to get involved, contact Jeroen De Meyer at
jrndemeyer [attttt] gmail.com.

There is more info about the event on http://www.diyday.be

Matchdogbot

Imagine a rainy summer day, a motor, a toothbrush and a battery, all ingredients for fun day making a bristlebot. But no such luck. Noa and his friends’s bristlebot kept flipping over, probably because the motor was a bit too strong for the toothbrush. But, the holiday tinkering spirit was strong that day, so, they also did experiments with Catamaranbots, which they kept on sailing in circles.

After these semi-failed experiments,  the holiday tinkering gang started playing with another variation, including matches and a matchbox, leaving the toothbrush and boat behind…

So here comes the…

Matchdogbot!


He has four legs made out of matches + a matchbox body + a superpaper head + 3 Volt battery + rotary vibration engine

(for the most part the ingredients of a bristlebot)


Here is the video of Matchdogbot, where in French Noa comments: “A motor of 2 euro, a battery of 50 cents and a box of one euro 50, which makes 4 euro.. Yes, says the other voice…”

Html compatible ogg video large
Html compatible ogg video small

Proprio .mov


Kitchen Budapest is looking for stupid Robots!

Kitchen Budapest is organizing Bacarobo Europe – Stupid Robot Championship

Call for applications! Submit your stupid robot idea and be one of the lucky winners who will participate at the show!

More information here: http://bacarobo.kibu.hu/?/apply

A few specs:

Who can apply?

Anyone from Europe over the age of discretion; anyone from Europe under the age of discretion with the permission of an adult representative. Application can be individual or team-work. In case of teams applying, they have to be represented by an individual who is in contact with the Organizer.

Conditions of submitted work:

Applicants must hold the intellectual property rights to the work submitted and be the legal originators of the creative product or project.

How to apply?
In order to apply you need to upload your project to bacarobo.kibu.hu.
Applicants can upload a max. 150-word-long description of their project in English, max. 3 JPG photos (up to 2MB each), and 1 video (max. 3-minute-long) uploaded to youtube/vimeo/other online video webpage.

Submitted work has to meet the following requirements:
Your robot has to function mechanically. E.g. making a paper-mache is not suf?cient, it must have some kind of mechanical feature.
Your robot must be meaningless or worthless. It must not have a reasonable goal or practical function that may be useful for the society, instead, it should have some stupid aims.
Your robot must make people laugh. BACAROBO must be made to entertain and surprise people by its stupid action, function or its humorous system.
You will have 3 minutes to set it up.
After the setting up has been completed, the truck has to be moved from the backstage to the stage.
Maximum 2 assistants may help handling the robot during the performance.
Your robot has 2 minutes for the performance. The applicant can only use a switch that can turn on and off the robot.
There is no time extension in case the machine has errors during the performance.
The project and all its related equipment should not exceed the width of 90cms and the depth of 120cms in order to be able to ride the trolley. The project’s height has to be within 180cms and it has to be within the weight of 80kgs. For powering the robot there is a 230V power supply (15A) available.
Do not use any kind of liquid that can explode by a spark.
On the day before the presentation day the authors will have the possibility to do a rehearsal with their robots if needed. Each applicant should consult this in advance.
The transportation and costs of the robot have to be arranged by the applicant.

In case of multiple applications from the same applicant, each project requires a separate registration.

Deadline:
You can register online between 30 March – 15 August 2011 at bacarobo.kibu.hu
Final decision: 30 August 2011
Announcement of results: 15 September 2011 on bacarobo.kibu.hu, also through email to applicants individually
Winner’s event: 30 October 2011 at Trafó-House of Contemporary Arts in Budapest –introducing the most useless stupid robots
Ellentriek in the parc

What are chips – no – not the ones you eat! How do you make a led burn?
Can you sew with electronics?

Come experiment with Ellentriek. Crocodile clamps don’t bite!
(We will work under 5 Volt – battery powered)

This is a workshop for children between 10 and 12 years old in the Parc of Foret/Vorst, Brussels, the 22nd of May.

Supported by the Municipalities of Sint-Gillis & Vorst

You’ve got the power

For almost all devices we use power supplies which transform AC into DC, adapted specifically to the power needs of the device.
This 9 pages in depth post about power and power supplies has been travelling all over internet. Jon Chandler specifically speaks about Wall Warts, the ones who transfer AC to DC.
His article was featured on Hackaday and Makezine – but I thought that for future reference it’s nice to write a little about it on Ellentriek.

power supplies

Important stuff!

Codes, colours and conventions

When you open up an electronic device, you are confronted with quite a lot of colours on the components (especially when the device has a certain age – smd components unfortunately are less colourful).

“The electronic color code was developed in the early 1920s by the Radio Manufacturers Association (now part of Electronic Industries Alliance (EIA)), and was published as EIA-RS-279. The current international standard is IEC 60062.

Colorbands were commonly used (especially on resistors) because they were easily printed on tiny components, decreasing construction costs. However, there were drawbacks, especially for color blind people. Overheating of a component, or dirt accumulation, may make it impossible to distinguish brown from red from orange. Advances in printing technology have made printed numbers practical for small components, which are often found in modern electronics.”

Resistors, for example, have three bands of colour indicating their value in Ohm – the fourth band indicates how accurate these values are. Knowing their value is essential, even already for basic electronics, because they control the voltage passing through your electrical circuit.
You can learn the values of these colours by heart, or you can use little helpers, who come in several shapes and sizes.

– There are lots of online resistor calculators
http://www.micro-ohm.com/colorcode/rescolor.html
http://www.leonaudio.com.au/res_code.htm

– I’m quite a fan of this resistor calculator:
cardboard resistor calculator

– There are good looking apps, such as this ElectroDroid.

When you use leds, having the right resistor at hand is very necessary, because when it gets too much power it stops working.
So, of course there are online calculators for leds!
Even thermistors have their own calculator.

Calculate!

Arduino, Processing and sensors Part 2

In my search for up-to-date tutorials on connecting sensors to Processing I found a few valuable threads.
They are clear, the code is GPL, the aesthetics are – well I guess not my taste – but opinions are very easy to get by – good tutorials – less easy to find (=a critical compliment). Jeremy goes a step further than the usual Hello World “Blink a led sketch”. I didn’t do what he does at 20 years old.

He starts with an introduction to Arduino:
http://jeremyblum.com/category/arduino-tutorials/

In tutorial 6 he already goes from receiving information from a sensor to sending out serial information for Processing to receive.
Tutorial 7 continues on this visualizing sensor information thread.

These two tutorials combined with this one from the Arduino playground website, will hopefully enable me to visualize my flex sensor data – my deadline is tonight. (GloupsGulpSlik)

Found through the use of a search engine and this blogpost.

Forum and real life hackerspace help

I had quite a lot of trouble making a waveshield (a soundmodule) and an Arduino Mega work. 20 real life buttons need to trigger 20 sounds, without the involvement of a computer (it’s an installation for here). As I was using a big Arduino, the usual easy connection had to modified, which has quite some consequences on the code level and how the sound was played. An unwanted effect was distortion on the sound whilst it was playing.

In this Forum post I explain the problem – and post a possible solution as well.

Thanks again, Gregor, Brussels Hackerspace and Leandro!