Ellentriek in the parc

What are chips – no – not the ones you eat! How do you make a led burn?
Can you sew with electronics?

Come experiment with Ellentriek. Crocodile clamps don’t bite!
(We will work under 5 Volt – battery powered)

This is a workshop for children between 10 and 12 years old in the Parc of Foret/Vorst, Brussels, the 22nd of May.

Supported by the Municipalities of Sint-Gillis & Vorst

Ellentriek #12 : Ellentriek goes High Voltage – HI VOLTAGE ! (new dates)

Where: De Pianofabriek, Rue du Fortstraat 35, 1060 Brussels
When: From 7 May 13:00 to 8 May 19:00

Ellentriek is a series of workshops where artists can come and work together on their own artistic electronics projects. We work with themes. This Ellentriek has two threads happening simultaneously. You choose which thread you want to follow.

Thread one: Normally Ellentriek stays under 20 Volt – direct current. For once we will explore the dangerous zones of High Voltage. Under the watchful eye of our expert we will look at Kirlian Photography, Van de Graaff generators, anti-gravity lifters… So be sure to wear rubber boots and gloves for this edition, because everything we do will be mighty dangerous.

Thread two: You can come and work on your own artistic projects with basic electronics and a little bit beyond. We have all kinds of tools for electronics, a nice collection of sensors, Arduino’s and collective brainpower.

Practical: If you want to come and have a look – you are welcome. If you already work with high voltage and you want to demonstrate your projects, contact us. Enrolling is advised. Please send an email to Wendy:

wendy [attt] constantvzw.org

If you have specific questions/needs with regard to your project, please let us know so we can collaborate more efficiently. This workshop is free & multilingual.

This workshop is organized in collaboration with De Pianofabriek Kunstenwerkplaats.

To prepare, we (=G, K, C & M) have already built a Jacob’s ladder:

You’ve got the power

For almost all devices we use power supplies which transform AC into DC, adapted specifically to the power needs of the device.
This 9 pages in depth post about power and power supplies has been travelling all over internet. Jon Chandler specifically speaks about Wall Warts, the ones who transfer AC to DC.
His article was featured on Hackaday and Makezine – but I thought that for future reference it’s nice to write a little about it on Ellentriek.

power supplies

Important stuff!

Codes, colours and conventions

When you open up an electronic device, you are confronted with quite a lot of colours on the components (especially when the device has a certain age – smd components unfortunately are less colourful).

“The electronic color code was developed in the early 1920s by the Radio Manufacturers Association (now part of Electronic Industries Alliance (EIA)), and was published as EIA-RS-279. The current international standard is IEC 60062.

Colorbands were commonly used (especially on resistors) because they were easily printed on tiny components, decreasing construction costs. However, there were drawbacks, especially for color blind people. Overheating of a component, or dirt accumulation, may make it impossible to distinguish brown from red from orange. Advances in printing technology have made printed numbers practical for small components, which are often found in modern electronics.”

Resistors, for example, have three bands of colour indicating their value in Ohm – the fourth band indicates how accurate these values are. Knowing their value is essential, even already for basic electronics, because they control the voltage passing through your electrical circuit.
You can learn the values of these colours by heart, or you can use little helpers, who come in several shapes and sizes.

– There are lots of online resistor calculators
http://www.micro-ohm.com/colorcode/rescolor.html
http://www.leonaudio.com.au/res_code.htm

– I’m quite a fan of this resistor calculator:
cardboard resistor calculator

– There are good looking apps, such as this ElectroDroid.

When you use leds, having the right resistor at hand is very necessary, because when it gets too much power it stops working.
So, of course there are online calculators for leds!
Even thermistors have their own calculator.

Calculate!

Arduino, Processing and sensors Part 2

In my search for up-to-date tutorials on connecting sensors to Processing I found a few valuable threads.
They are clear, the code is GPL, the aesthetics are – well I guess not my taste – but opinions are very easy to get by – good tutorials – less easy to find (=a critical compliment). Jeremy goes a step further than the usual Hello World “Blink a led sketch”. I didn’t do what he does at 20 years old.

He starts with an introduction to Arduino:
http://jeremyblum.com/category/arduino-tutorials/

In tutorial 6 he already goes from receiving information from a sensor to sending out serial information for Processing to receive.
Tutorial 7 continues on this visualizing sensor information thread.

These two tutorials combined with this one from the Arduino playground website, will hopefully enable me to visualize my flex sensor data – my deadline is tonight. (GloupsGulpSlik)

Found through the use of a search engine and this blogpost.

Forum and real life hackerspace help

I had quite a lot of trouble making a waveshield (a soundmodule) and an Arduino Mega work. 20 real life buttons need to trigger 20 sounds, without the involvement of a computer (it’s an installation for here). As I was using a big Arduino, the usual easy connection had to modified, which has quite some consequences on the code level and how the sound was played. An unwanted effect was distortion on the sound whilst it was playing.

In this Forum post I explain the problem – and post a possible solution as well.

Thanks again, Gregor, Brussels Hackerspace and Leandro!

How to see infrared light when you are a human.

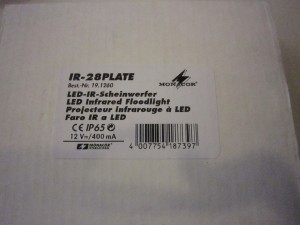
A couple of days ago I was asked to do a little simple soldering task: attach a plug to provide current through an adaptor to a infrared lamp.
These are the specifications of the little lamp:

It was a matter of connecting the plus cable of the adaptor to the plus cable of the lamp – and the same goes for the minus.
But how do you test whether your lamp works? (ask a bee or a bird :-))
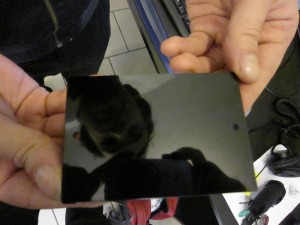
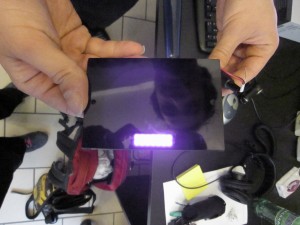
Because to your human eyes, the lamp looks like this, whether it is working or not:

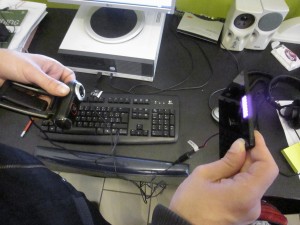
So we had a little think – and then we remembered that camera’s do see infrared light (quite a few gamecontrollers work that way now as does your remote control.

This is an animation from that article on Wikipedia: “the infrared diode modulates at a speed corresponding to a particular function. When seen through a digital camera, the diode appears to illuminate purple light.”

animated gif to show how a remote control pulsates infrared light

First we had the webcam have a look at this floodlight:

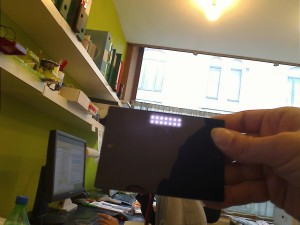
Then our regular photocamera:

It works!

(be sure not to look too long into this light)

From Arduino (5 Volt DC) to 220 Volt AC

For quite a few of the Ellentriek#11 projects, participants wanted to connect Arduino to the main current system: 220 Volt.
As this can be tricky, it’s good to look for solid solutions.
I have found a relay set-up which is safe to use with 220 volt and arduino (yeay!).

This is the little board:
http://www.sparkfun.com/products/9096
and you need of course to add all the components. The transistor and diode are essential for safety (making sure that the current only goes into one direction).

There is a tutorial on how to build it:
http://www.sparkfun.com/tutorials/119

I buy all my Sparkfun stuff here, which makes sure that you avoid the international shipping costs and the US taxes.

(I got the relay specs here)